Refrigerator Leaking Water on the Floor: Causes and Fixes
Safety notice: Unplug your refrigerator before reaching behind it, removing panels, or inspecting water lines. Standing water near any electrical appliance is a slip hazard and a shock hazard. Dry the floor thoroughly before working, and keep a stack of old towels on hand.
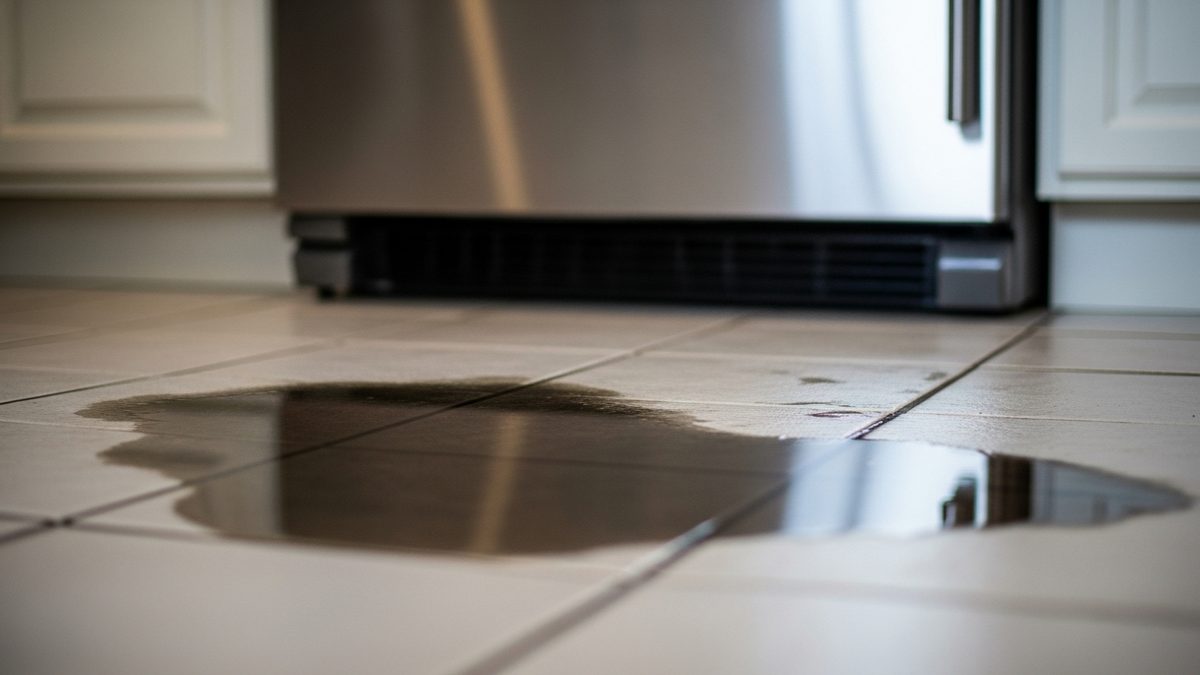
A small puddle under the fridge, a wet spot on the kitchen floor, or a dripping sound you can't quite locate — these are surprisingly common problems, and the good news is that most refrigerator leaks have a straightforward cause. Very few require a major repair.
The key is finding where the water is coming from. Leaks from inside the appliance are different from leaks coming from the water supply connections behind it. This guide walks through each source in order of likelihood so you can zero in on the problem fast.
If your fridge is also running warm or the freezer section is fine but the refrigerator isn't cooling, take a look at our companion guide on fridge not cooling — sometimes both problems happen at the same time.
Most likely causes (ranked by frequency)
1. Clogged or frozen defrost drain (most common) Every frost-free refrigerator runs a defrost cycle several times a day. Meltwater from the evaporator coils drips down to a drain hole in the freezer floor, travels through a drain tube, and empties into a drain pan under the unit where it evaporates. When that drain hole or tube gets plugged with food debris, ice, or mold, water has nowhere to go. It overflows onto the freezer floor and eventually drips out through the bottom of the unit onto your kitchen floor. This is by far the most common cause of a refrigerator leak.
2. Cracked or overflowing drain pan The drain pan sits beneath the refrigerator and collects the water from the defrost cycle. The pan is designed to allow that water to evaporate from the heat of the compressor and condenser coils. If the pan cracks, gets knocked out of position, or the evaporation rate can't keep up (common in very humid climates), it overflows. A cracked pan will leak even when the drain is clear.
3. Water supply line or filter connection Refrigerators with an ice maker or water dispenser connect to your home's water supply with a plastic or braided supply line. The line itself can develop a hairline crack, or the compression fitting where it connects can loosen over time. The filter housing and filter head are another common leak point — a filter that isn't fully seated or a housing with a cracked O-ring will drip slowly but steadily. The leak usually shows up behind or at the side of the fridge.
4. Ice maker water inlet valve The water inlet valve is the solenoid-controlled valve that opens to fill the ice maker mold. If the valve fails to close completely, water dribbles into the ice maker continuously, the tray overflows, and the excess water runs down and out of the freezer. A cracked valve body can also drip directly.
5. Refrigerator not level This one surprises people. Refrigerators are designed to sit very slightly tilted back — about a quarter inch lower in the rear — so that the doors swing closed on their own and so that water in the drain pan flows toward the back (toward the evaporator heat) rather than to the front. If the unit is pitched forward, water in the drain pan can flow toward the front and drip out from under the door.
Troubleshoot it yourself (safely)
Step 1 — Locate the water before anything else. Dry the floor and put paper towels down in different spots. Come back in an hour and check which towels got wet. If the wet spot is near the front-center, the drain pan or defrost drain is most likely. If it's near the back or side where the water line connects, the supply line or filter is the culprit.
Step 2 — Check the drain pan. Unplug the fridge and pull it away from the wall. The drain pan is typically a shallow plastic tray that slides out from the bottom front or is accessible from the back. Pull it out and inspect it for cracks. Empty it if it is full. A cracked pan can be replaced for $20–$50 from an appliance parts supplier using your model number.
Step 3 — Clear a clogged defrost drain. Unplug the fridge. Remove the freezer shelves and the rear panel (usually held by 4–6 screws). You'll find the evaporator coils and, at the bottom, a drain hole. If it's frozen over, use a turkey baster or a squeeze bottle filled with hot (not boiling) water to melt the ice plug. Once clear, use a pipe cleaner or small flexible brush to clear any debris from the tube below. Follow with a mix of one teaspoon of baking soda per cup of warm water poured down the drain to discourage future mold growth.
Step 4 — Inspect the water supply line. Pull the fridge out from the wall. Trace the supply line from the wall valve to the back of the unit. Look for any cracks, kinks, or moisture. Check the fittings at both ends. Plastic supply lines can become brittle over time and develop small cracks. If you see any, replace the entire line — a braided stainless steel line is more durable and costs about $15–$25 at a hardware store. Hand-tighten fittings and then snug them a quarter-turn with a wrench; overtightening cracks plastic fittings.
Step 5 — Check and reseat the water filter. If your model has an internal water filter, remove it and reinstall it according to the manufacturer's instructions. Make sure you hear or feel the click that indicates a proper seat. A filter that is only partially inserted will leak from the housing. Also check the O-rings on the filter head — replace them if they look flattened or cracked.
Step 6 — Level the refrigerator. Use a bubble level on top of the unit. Most refrigerators have adjustable front leveling legs you can turn by hand or with a flat screwdriver. The unit should be level side-to-side and tilted very slightly back (front legs raised about a quarter inch higher than the rear) so the doors self-close and the drain pan drains to the rear.
Safety first
- Unplug before you work. Even checking behind the fridge, where the water line connects, should be done with the unit unplugged. You do not want to accidentally move the unit and pinch the power cord while the compressor is running.
- Water on the floor is a slip hazard. Dry the area completely before walking around or pulling the fridge out. Tile and hardwood floors get extremely slippery.
- Do not over-tighten plastic water line fittings. Plastic compression nuts crack easily. Hand tight plus a quarter turn is usually enough.
- Shut off the water supply valve first before disconnecting any water line or filter. The valve is typically behind the fridge near the floor or under the kitchen sink. Turn the handle clockwise until it stops.
When to call a licensed pro
Most defrost drain clogs and supply line issues are reasonable DIY repairs. Call a licensed appliance technician when:
- You cleared the defrost drain but the clog returns within a week or two — the defrost heater or thermostat may be failing, which requires component-level diagnosis.
- The water inlet valve is dripping and you are not comfortable disconnecting the water supply and replacing a solenoid valve.
- Water appears to be coming from inside the sealed refrigeration system (oily residue, frost patterns that don't make sense) — that points to a refrigerant issue.
- The leak is coming from inside the door (ice maker chute area) and reseating the fill tube doesn't help.
Repair vs. replace: A supply line swap or drain pan replacement is almost always worth doing regardless of the fridge's age — these are cheap parts. If the water inlet valve or a more significant component needs replacing on a unit over 12–15 years old, get a repair estimate first and compare it to the cost of a new unit.
What it typically costs (2025–2026 estimates)
| Repair | Typical cost range |
|---|---|
| Service call / diagnostic | $75 – $150 |
| Defrost drain clearing (pro) | $100 – $200 |
| Drain pan replacement | $75 – $150 (parts + labor) |
| Water supply line replacement | $50 – $150 |
| Water filter housing repair | $75 – $175 |
| Water inlet valve replacement | $150 – $300 |
| Leveling adjustment | Often included in service call |
Common mistakes to avoid
- Ignoring a small drip. A slow leak from a supply line fitting can become a floor-soaking failure overnight, especially if a plastic line finally gives out.
- Pouring boiling water into the defrost drain. Very hot water can crack the plastic drain housing. Use warm or hot tap water instead.
- Reinstalling the water filter without checking the O-ring. A new filter with a damaged O-ring will still leak. Inspect the O-ring every time you change the filter.
- Not shutting off the supply valve before disconnecting the water line. This turns a simple repair into a kitchen flood.
- Forgetting to re-level after moving the fridge. Any time you pull the fridge out and push it back in, check the level and readjust the legs if needed.
How to prevent refrigerator leaks
- Replace the water filter on the manufacturer's recommended schedule — typically every 6 months. A clogged filter increases water pressure in the supply circuit and stresses fittings.
- Pour about a cup of water down the defrost drain once a year to confirm it is clear. Do this during a manual cleaning of the inside of the freezer.
- Inspect the water supply line every time you clean behind the fridge. Lines older than 5–7 years should be proactively replaced with braided stainless steel.
- Keep the drain pan clean. Wipe it out during your annual behind-fridge cleaning and check for hairline cracks.
- Do not overfill the freezer to the point where food contacts and can block the drain hole.
Frequently asked questions
Where is the defrost drain located? In most refrigerators, the defrost drain hole is at the back center of the freezer floor, just below the evaporator coils. On some models it is behind a small plastic cover. The drain tube runs down and to the rear of the unit, emptying into the drain pan underneath.
How do I know if the leak is from the water line or from inside the fridge? Pull the fridge away from the wall and inspect the water supply line connection while the fridge is on. A supply line leak will show moisture around the fitting or along the line itself. A defrost drain leak will show up as water dripping from the bottom of the unit, often near the front center.
Can I use the fridge while the drain is clogged? Technically yes, but you risk water overflowing onto your floor and potentially into adjacent cabinetry. It is better to clear the drain as soon as possible and to stop using the ice maker if the ice maker fill tube is contributing to the overflow.
How often should I replace the water supply line? Most appliance manufacturers recommend replacing plastic water supply lines every 5 years. Braided stainless steel lines last longer — 10 years or more — and are less prone to cracking. Check the line at least once a year.
My fridge is leaking from the front bottom — what is it? Front-bottom leaks are almost always the defrost drain or the drain pan. The drain empties into the pan at the rear, but if the pan is cracked or has shifted forward, the water ends up at the front. Check the pan first — it's usually the quickest fix.
Need help with your refrigerator?
If you have worked through these steps and the leak is still happening, a licensed appliance technician can track it down quickly. Contact Local Service Group for a free quote and we'll connect you with a qualified pro in your area.
Sources
- ENERGY STAR (U.S. EPA/DOE) — Refrigerator tips and maintenance guidance: https://www.energystar.gov/products/refrigerators
- U.S. Department of Energy — Energy Saver: Refrigerators: https://www.energy.gov/energysaver/refrigerators
- Whirlpool Corporation — Refrigerator owner support and use-and-care guidance: https://www.whirlpool.com/refrigerators.html
- Samsung Electronics USA — Refrigerator support and troubleshooting: https://www.samsung.com/us/support/
- LG Electronics USA — Refrigerator help library: https://www.lg.com/us/support/help-library
Disclaimer
The information on this page is provided for general educational purposes only and is offered "as is" and "as available," without warranties of any kind, whether express or implied — including, without limitation, any warranties of accuracy, completeness, reliability, merchantability, or fitness for a particular purpose. It is not professional advice and is not a substitute for inspection, diagnosis, or repair by a licensed, qualified professional.
Home systems involving gas, electricity, water, refrigerant, fire, or structural components can be hazardous, and requirements vary by local code and jurisdiction. Any inspection, diagnosis, repair, installation, or other action referenced on this page should be performed by a licensed professional. You should not rely on this content to perform such work yourself. To the fullest extent permitted by law, [Company Name] and its owners, employees, and contributors assume no responsibility or liability for any injury, death, property damage, or other loss arising out of or in connection with the use of, or reliance on, this information.
If you smell gas or suspect a carbon monoxide leak, leave the area immediately and call 911 or your gas utility from a safe location.